Toyota Corolla (E120): Replacement
1. Remove console box sub–assy rear
2. Remove parking brake lever sub–assy
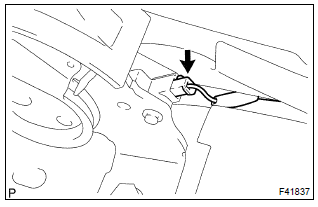
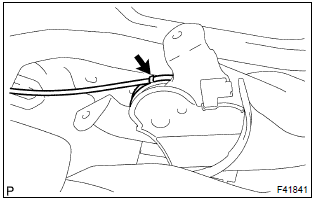
- Disconnect the parking brake switch connector from the parking brake switch.
- remove the lock nut and adjusting nut from the parking brake cable assy no.1.
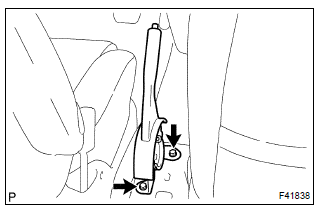
- Remove the 2 bolts.

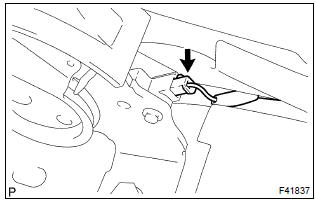
- Using a screwdriver, raise the pick on the parking brake lever, and remove the parking brake cable assy no.1 From the parking brake lever.
- remove the parking brake lever from the body.
3. Remove parking brake switch assy
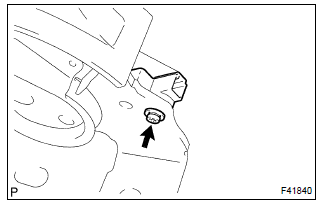
- Remove the screw and parking brake switch assy.
4. Install parking brake switch assy
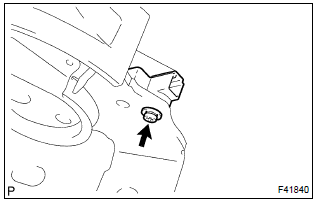
- Install the parking brake switch to the parking brake lever sub–assy with the screw.
5. Install parking brake lever sub–assy
- Install the parking brake cable assy no.1 To the parking brake lever, temporarily tighten the adjusting nut and lock nut.
- using a screwdriver, fix the parking brake cable no.1 To the pick.
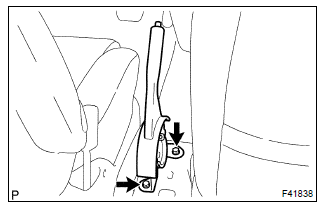
- Install the parking brake lever with the 2 bolts.
Torque: 12.5 Nvm (130 Kgf·cm, 9 ft·lbf)
- Connect the parking brake switch connector to the parking brake switch.
6. Inspect parking brake lever travel
7. Adjust parking brake lever travel
8. Install console box sub–assy rear


Other materials:
Window lock switch
Press the switch to lock the passenger window switches.
Use this switch to prevent children from accidentally opening or closing a passenger
window.
■The power windows can be operated when
► Vehicles without a smart key system
The engine switch is in the “ON” position.
υ ...
Smart key system
The following operations can be performed simply by carrying the electronic
key on your person, for example in your pocket.
(The driver should always carry the electronic key.)
● Locks and unlocks the doors
● Opens the trunk
● Starts the engine
■Antenna location
1 A ...
Light control switch circuit
Wiring diagram
Inspection procedure
1 Check headlamp dimmer switch assy (light control switch)
2 Check wire harness (tvip ecu light control switch)
Disconnect the tvip ecu and light control switch connectors.
check the continuity between the terminals of the tvip
e ...